Postmortems in StatusDrift let you document what happened during a resolved incident, keep internal follow-up notes in one place, and publish a customer-facing summary on your status page when you are ready.
Before you start
- Use a resolved incident so the final timeline and impact are clear.
- You need permission to view incidents and edit postmortems in your organization.
- If you plan to publish publicly, make sure the incident is associated with a public status page.
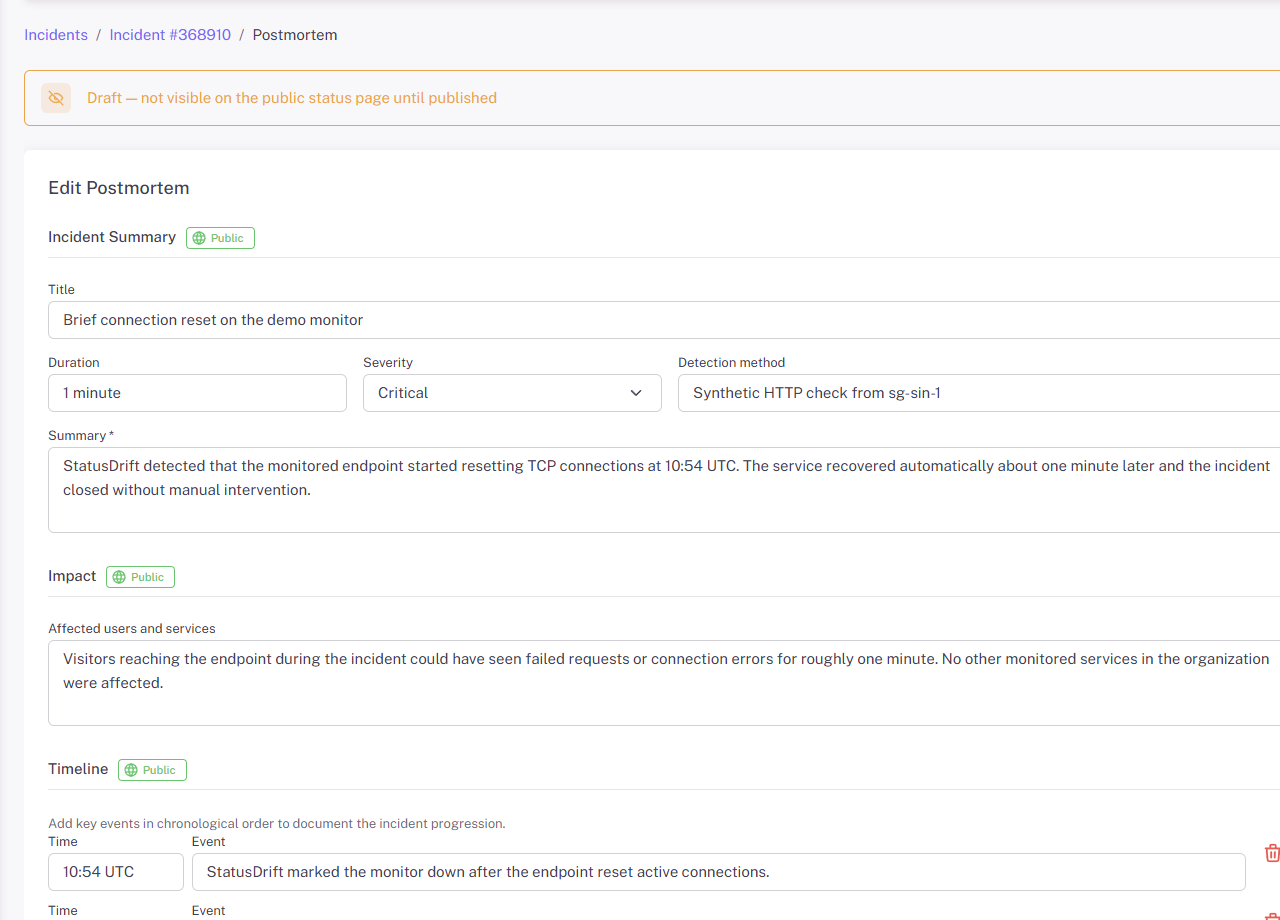
Create the first draft
Open Incidents, choose the resolved incident, and select Create Postmortem. Complete the sections marked Public first:
- Incident Summary for the title, duration, severity, detection method, and summary.
- Impact for affected users, services, or systems.
- Timeline for key events in chronological order.
- Analysis for the trigger, root cause, and resolution.
Select Create Postmortem to save the initial draft. After the draft exists, the Publish button becomes available.
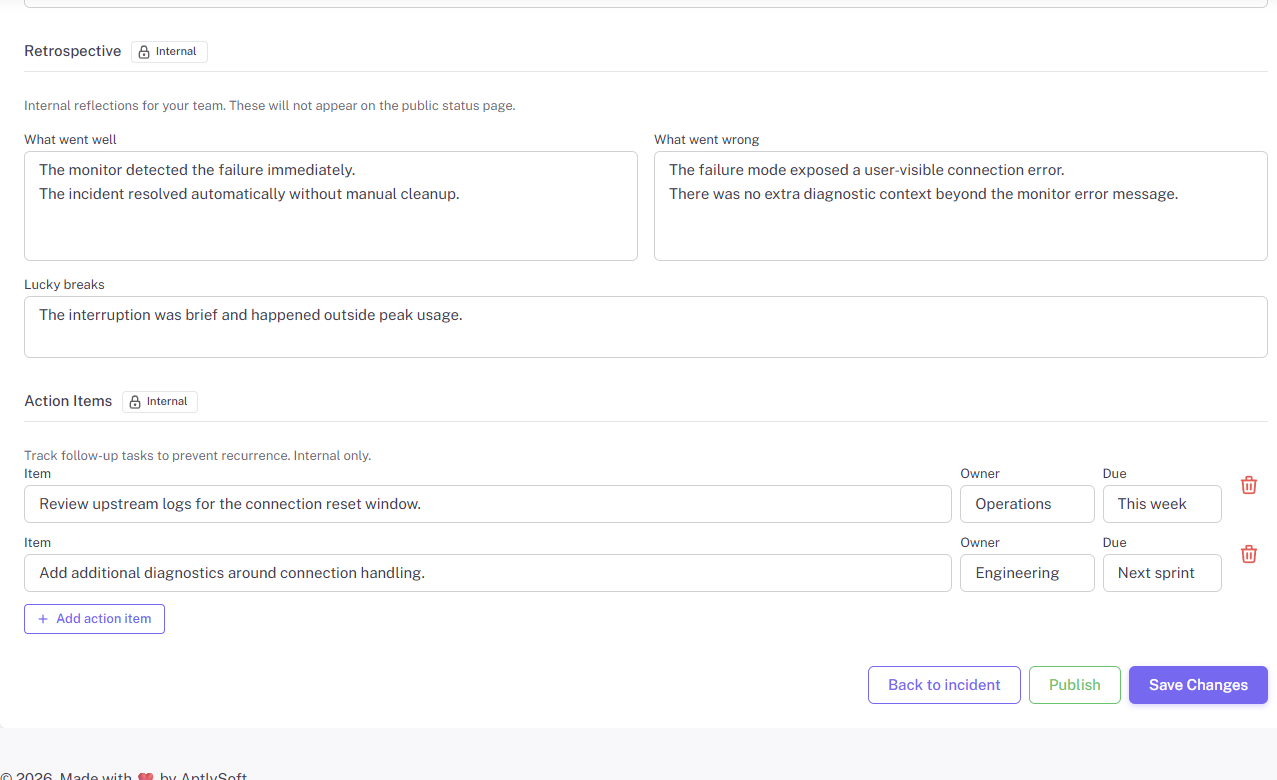
Keep team-only notes internal
Use Retrospective and Action Items for internal follow-up. These sections are marked Internal in the editor and do not appear on the public status page.
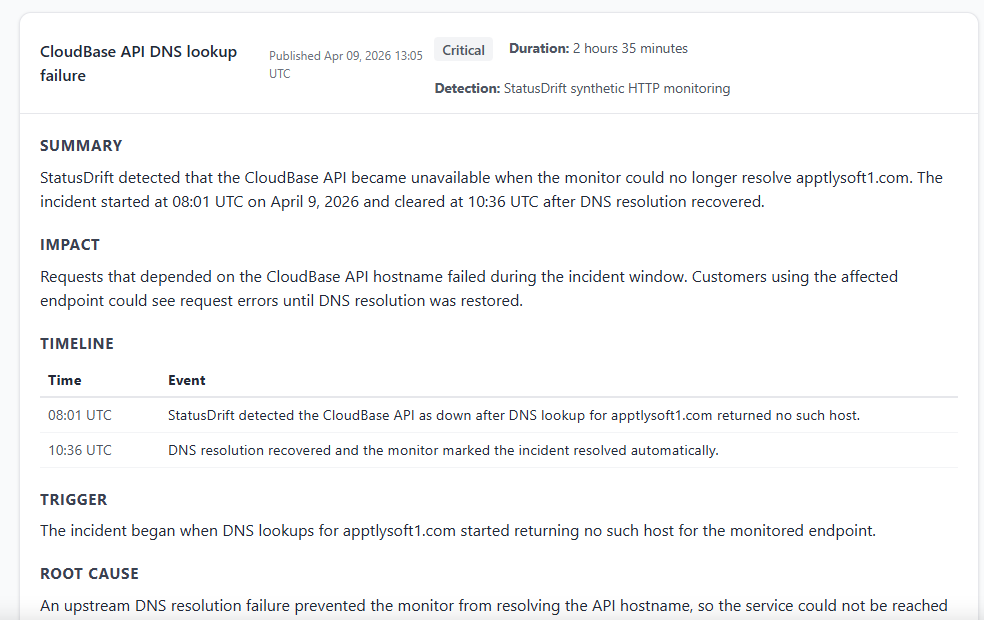
Publish the postmortem
- Review the draft and make sure the sections marked Public use customer-facing language.
- Select Publish.
- Open the same incident on your public status page to verify the published postmortem card.
The public version can include the postmortem title, publish time, severity, duration, detection method, summary, impact, timeline, trigger, root cause, and resolution.
Update or unpublish later
You can return to the same postmortem any time to edit the content, add new internal notes, or change the public copy. If you need to remove it from the status page, select Unpublish. The draft stays available inside StatusDrift for future updates.