StatusDrift provides role-based access control that lets you manage who can view, edit, and manage incidents for your monitors. This is especially powerful when combined with monitor groups, allowing you to give team members access to only the resources they need.
Understanding Role Types
When you invite collaborators to your StatusDrift organization, you assign them one of two role types: global roles or group-specific access.
Global Roles
Global roles provide access across all monitors and resources in your organization:
Admin
Full administrative access to the entire organization. Admins can:
- Create, edit, and delete all monitors
- Manage monitor groups and tags
- Manage maintenance windows
- Configure notification channels
- Manage status pages
- Invite and manage team members
- Access billing and organization settings
- Configure SAML/SSO
Global Editor
Can edit all monitoring resources but cannot manage team members or billing:
- Create, edit, and delete monitors across all groups
- Manage monitor groups and tags
- Manage maintenance windows
- Manage status pages
- Configure notification channels
- Cannot invite team members or access billing
Global Viewer
Read-only access to all monitors and dashboards:
- View all monitors and their status
- View response time charts and uptime history
- View incidents and maintenance windows
- Cannot create, edit, or delete any resources
Global Communication
Focused on incident communication and status page management:
- Create and manage incidents
- Schedule and manage maintenance windows
- Update status pages
Group-Specific Access (Member Role)
The Member role with group access provides granular permissions tied to specific monitor groups. This is ideal when you want team members to only access certain parts of your infrastructure.
When assigning the Member role, you select which groups the user can access and what level of access they have for each group:
Group View Access
Read-only access to monitors in the specified groups:
- View monitor status and details
- View incidents affecting these monitors
- View status pages
- View maintenance windows
Group Editor Access
Can edit monitors within the specified groups:
- Everything in View access
- Create new monitors in these groups
- Edit existing monitors in these groups
- Delete monitors in these groups
- Create, update or delete tags not associated with other monitors
- Manage notification channels
Group Communication Access
Can manage incidents for monitors in the specified groups:
- View monitor status and details
- View status pages and post announcements
- Manage maintenance windows
- Create, post update or resolve incidents for monitors in these groups
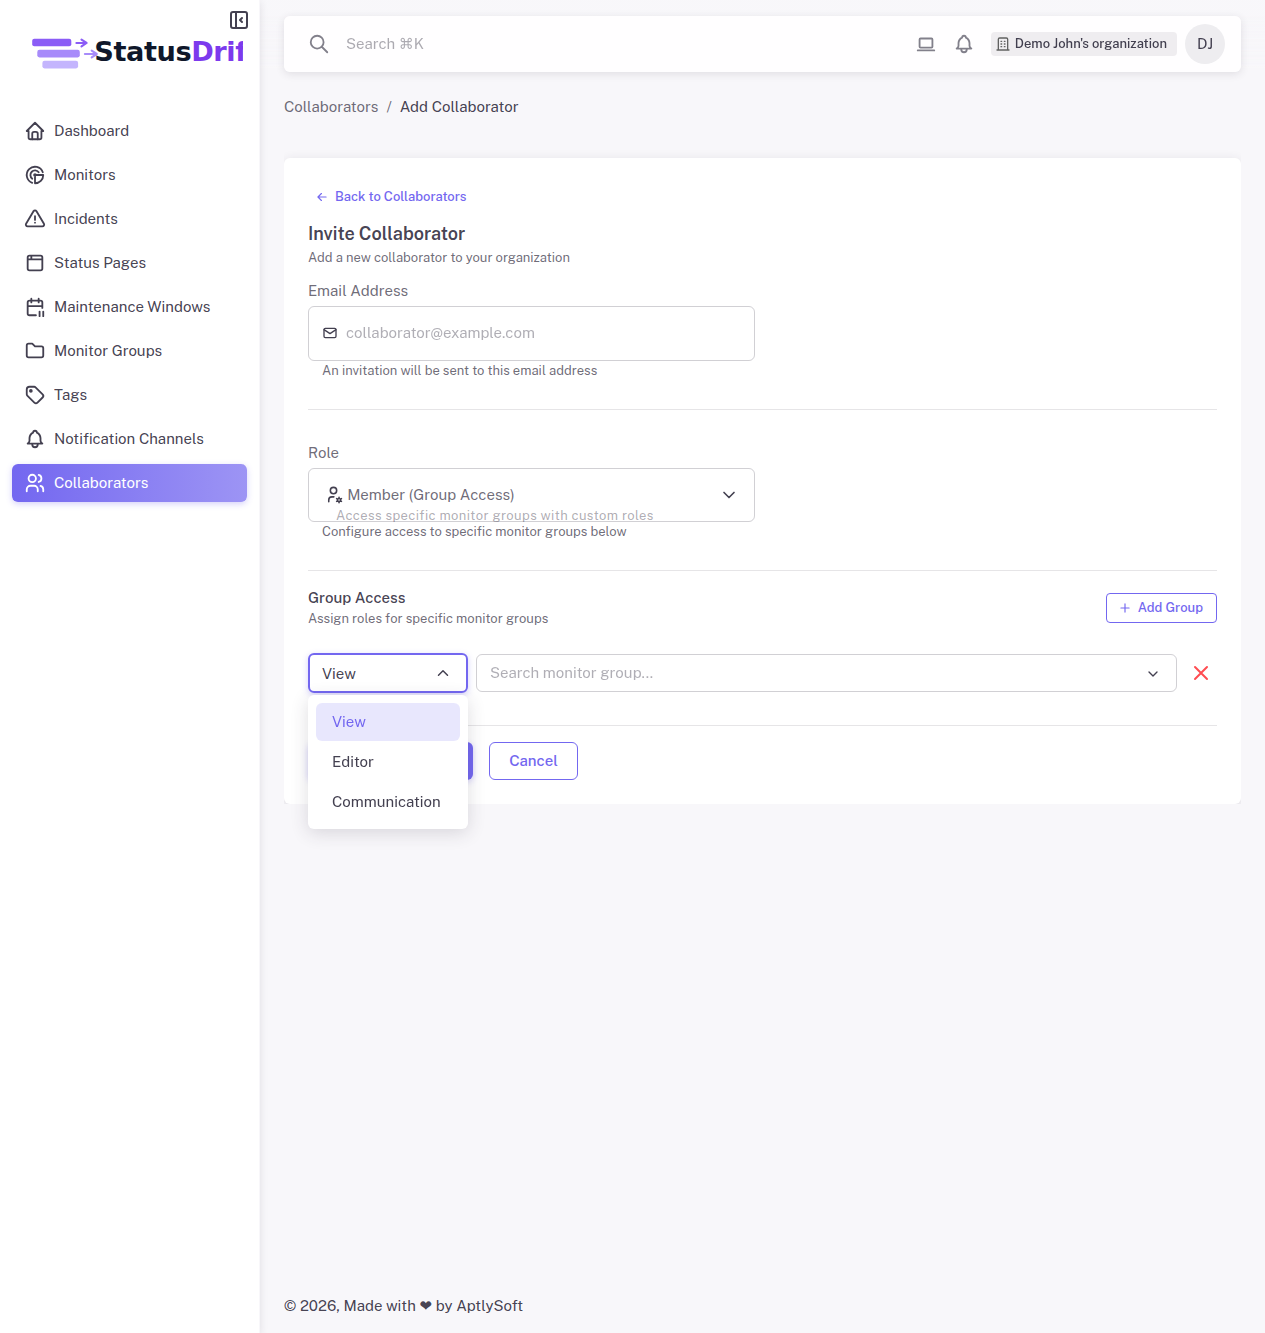
Setting Up Group Access
To invite a team member with group-specific access:
- Navigate to Collaborators in the sidebar
- Click Invite Member
- Enter the team member’s email address
- Select Member (Group Access) as the role
- For each group you want to grant access to, select the permission level (View, Editor, or Communication)
- Click Send Invite
The invited user will receive an email to join your organization with the specified permissions.
Common Access Patterns
Here are typical scenarios for configuring team access:
Development Team Access
Give developers full control of staging but limited access to production:
- Staging Environment group: Editor
- Production Services group: View
On-Call Team Access
Allow on-call engineers to manage incidents across all environments:
- All production groups: Communication
Or assign Global Communication role for access to all monitors.
External Partner Access
Share monitoring status with external partners without exposing internal systems:
- Partner Integration group: View
Team Lead Access
Give team leads full control of their team’s monitors:
- Platform Team group: Editor
- Platform Team group: Communication
Best Practices
- Plan your groups with access in mind – Structure monitor groups based on who needs access, not just technical organization
- Use least privilege – Start with View access and only grant Editor or Communication when needed
- Separate production and non-production – Create distinct groups to control who can modify production monitors
- Audit access regularly – Review team member permissions as roles change
- Use global roles sparingly – Reserve Admin and Global Editor for senior team members
- Document your access model – Maintain clear documentation of what each role can do
Next Steps
- Organizing Monitors with Groups – Learn how to create and manage monitor groups
- Advanced Monitor Settings – Configure timeouts, thresholds, and more
- Configuring Monitor Alerts – Set up custom alert rules