A status page is your public communication hub during outages and maintenance. It keeps customers informed without flooding your support team with tickets. This guide walks you through creating your first status page in StatusDrift.
Why You Need a Status Page
When your service goes down, customers want answers. A status page provides:
- Fewer support tickets – Customers check the status page instead of contacting support
- Transparency – Build trust by communicating openly about incidents
- Automatic updates – Link monitors to your status page for real-time status changes
- Professional branding – Match your company’s look with custom logos, colors, and themes
Create Your Status Page
From your dashboard, navigate to Status Pages in the sidebar and click + Add Status Page.
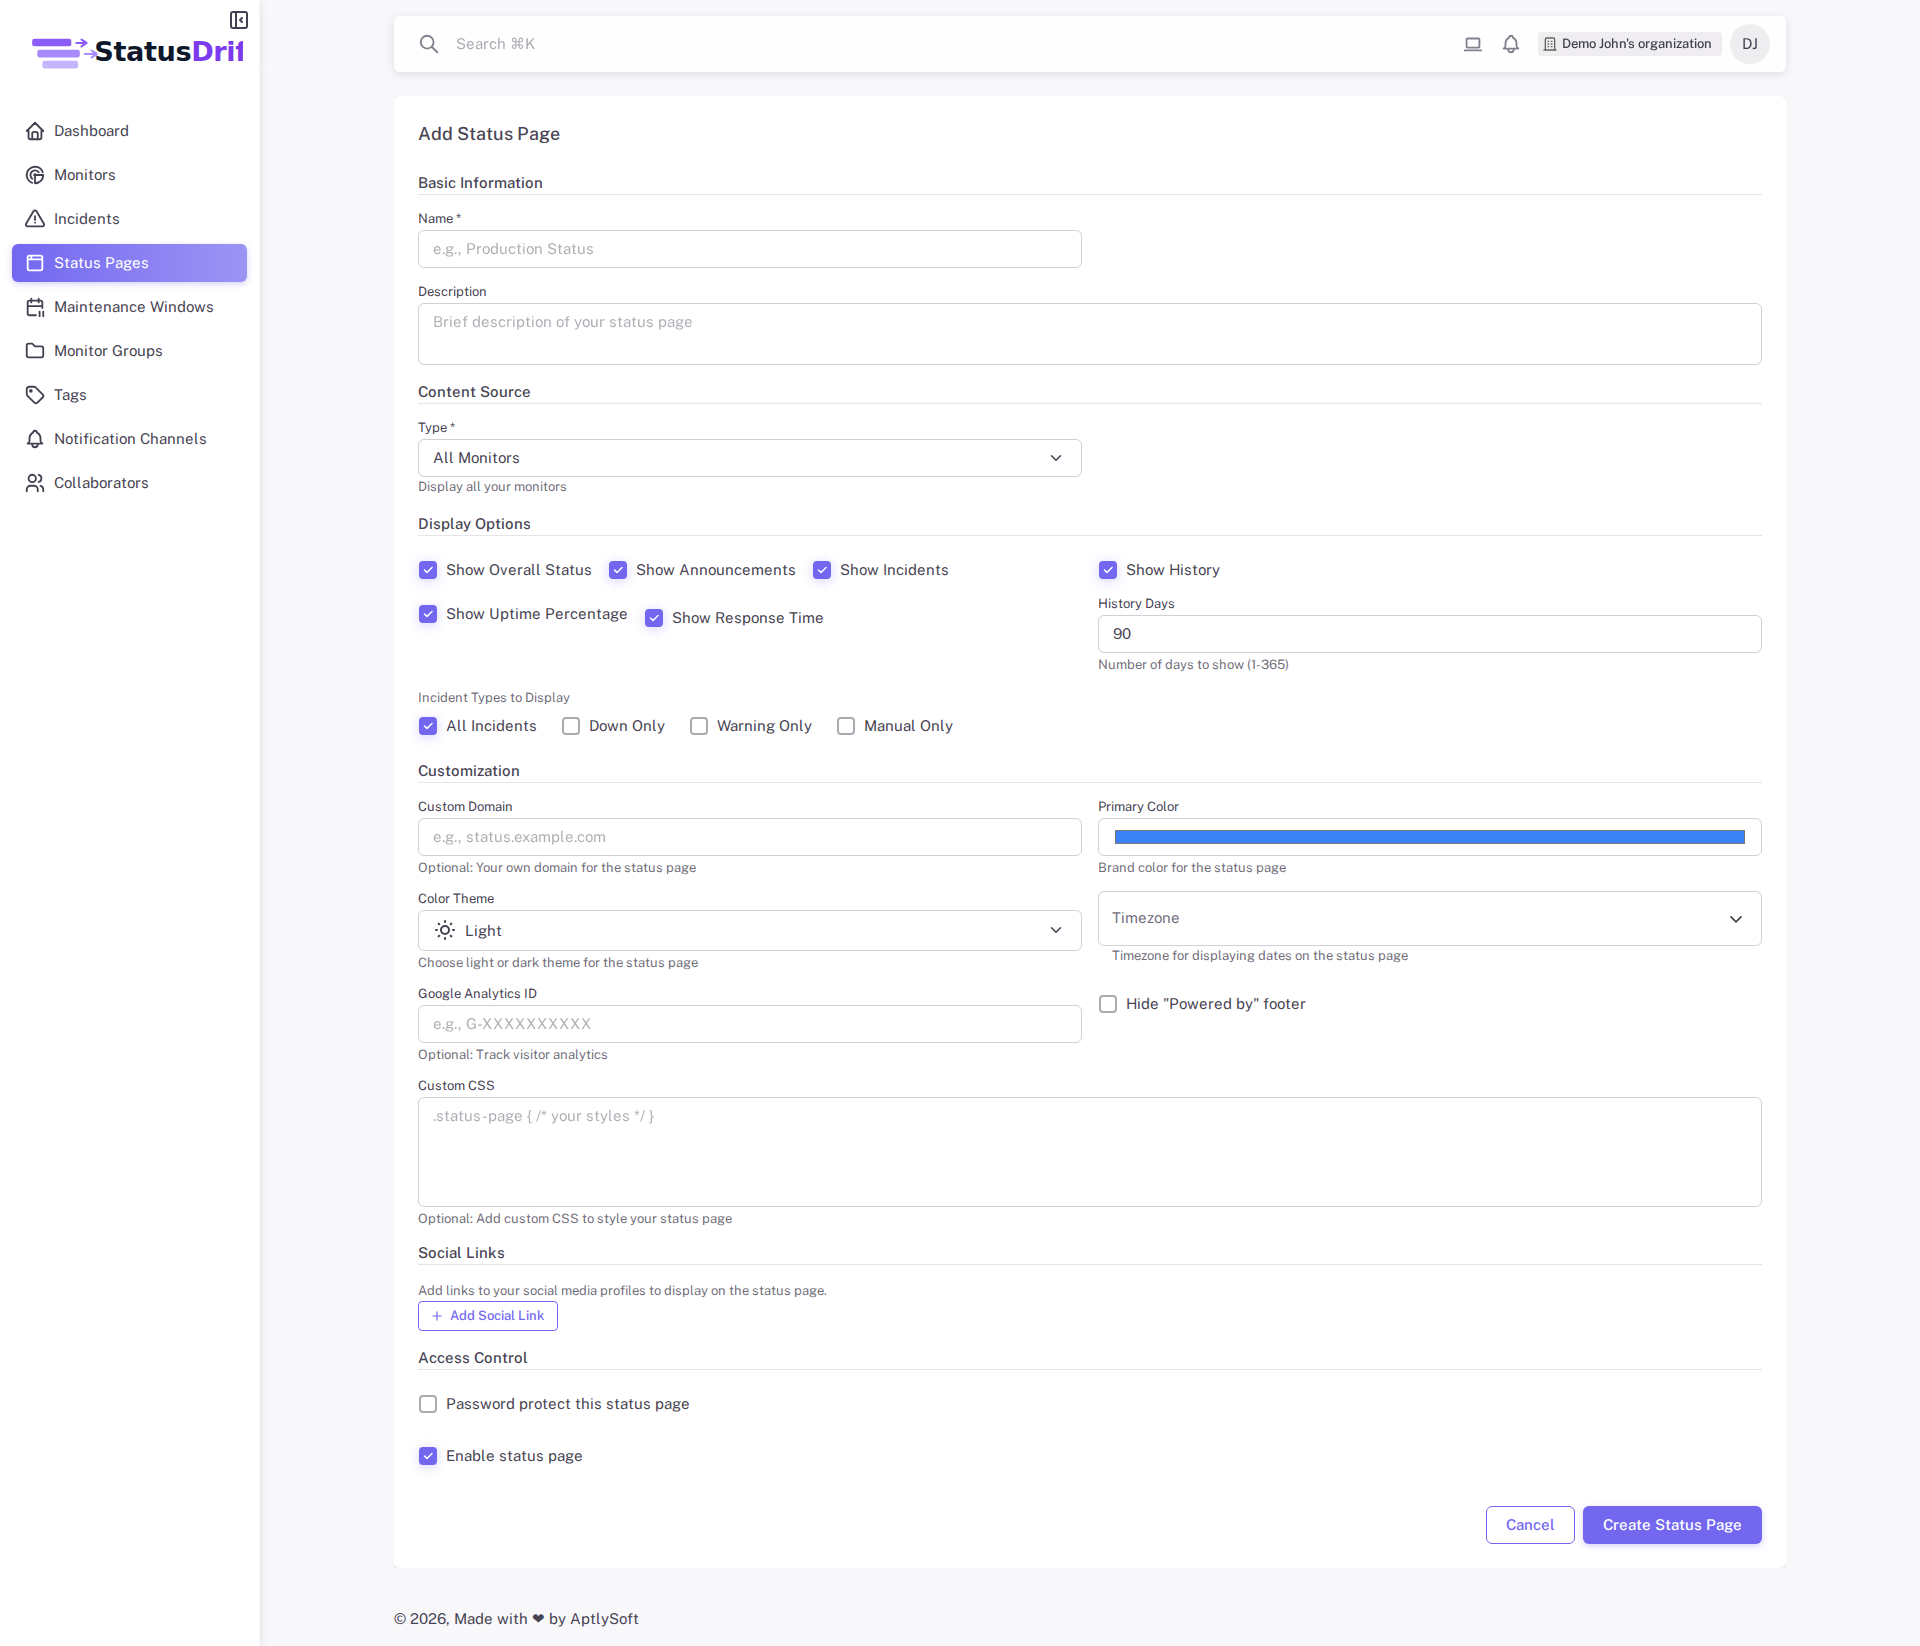
Basic Information
Start by giving your status page a name and optional description. The name appears as the title on your public status page.
Content Source
Choose what content to display on your status page using the Type dropdown:
- All Monitors – Display all your monitors on the status page
- Single Monitor – Show just one specific monitor
- Monitor Group – Display monitors from a specific group
- Tag – Show monitors matching a specific tag
- Custom – Build a custom layout with sections
For a detailed explanation of each option, see Status Page Content Types.
Display Options
Control what information appears on your status page:
- Overall status indicator
- Announcements and incidents
- Uptime percentage and response time metrics
- Historical data (configurable up to 365 days)
Customization
Make the status page match your brand:
- Primary Color – Set your brand color using the color picker
- Color Theme – Choose between Light and Dark themes
- Custom CSS – Add advanced styling if needed
- Social Links – Add links to your social media profiles
For comprehensive customization options, see Customizing Your Status Page.
Using a Custom Domain
Want your status page at status.yourcompany.com? Enter your custom domain in the Customization section. After saving, you will see a CNAME target value. Add this as a CNAME record with your domain registrar and the page will be available on your domain.
For step-by-step DNS configuration instructions, see Setting Up a Custom Domain.
Access Control
By default, your status page is public. You can optionally password-protect it for internal use or private beta testing. Use the Enable status page toggle to control whether the page is accessible.
Learn more in Password Protected Status Pages.
Next Steps
Once your status page is live, you can:
- Post announcements to communicate updates to your users
- Create incidents to communicate outages
- Schedule maintenance windows in advance
- Enable subscriber notifications so customers get email updates